The card making process
I have been making quite a few cards this weekend due to a big order, so i thought it would be quite good to show the process and to see how you can really achieve everything yourself.......
So it all starts off choosing the theme of the card and what colour scheme you want it to have. All my cards have a kind of set layout at the moment and so this is the usual starting block for me. Make sure you are using a really good strong glue - if you are giving these cards to other people you dont want them falling apart on them! 
Although there are some really lovely papers out there and ready made items to attach, I like to make my own from scratch : no chance then of them ending up looking like somebody elses! Plus i think it adds a special something extra as as they say with cooking - make something with love and it is simply better......... or something like that! So here are the magical scissors that i have got - they cut the edges of the paper to the shape you can see on the side of the blade - you can buy many different pattern cutting pairs, but I find that personally these ones have done me fine......though never say never!!!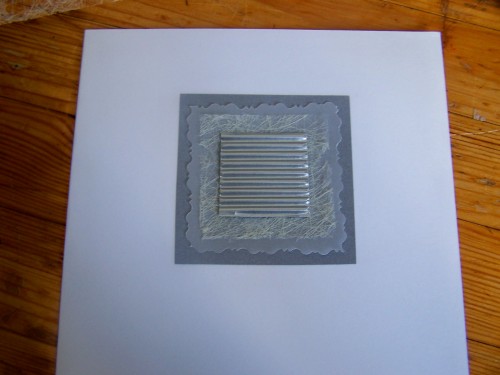
So for this card I want it to be quite soft and sensitive. Think about the shapes you are using and the desired effect you want, and make sure the 2 match....for example,if you look at my other cards, when i make cards designed for men, I usually keep to straight lines at the edges of the paper, and no the frilly looking patterns like here....
One thing I also like to do with my cards is attach some corugated card in the middle to act as i kind of plinth to raise the detail in the middle. I feel it helps centralise the viewers focus - plus it is good to have almost a trade mark look so if your cards or whatever start getting popular, then people can spot them from the rest.
Here is a good example of how you can achieve these items yourself and do not need to buy them....I have made this cross quite simply out of cutting the card with the pattern edging scissors - it gives a lovely effect and saved me about 20:- (about £1.20 say)....
I also use sticky pads to raise my central features even further, thus creating a lovely 3d effect.
Add a finishing touch of a rose (ok so i bought this! ;-) ) And think of a nice simple statement to write on the front. Now you can see why I chose these certain colours and effects. Another neat trick is not to use black ink all the time. It is very stark against the white back ground - so by using another colour you get a more asthetic appeal. But dont go too soft in colour or too light, you do need to be able to read the saying!
So this is how I make up my cards...The majority of the time spent is coming up with a nice composition. Dont stick things down straight away - move things about, try out different colours, paper types, etc - and try to get somebody elses opinion (my poor boyf is constantly getting badgered by me for his thoughts!) - remember, it isnt yourself who is necessarily going to be using the card! you have to be able to make them appeal to different tastes......
Any other questions or thoughts please do leave me a comment (in the kommentarer bit for the non swedish speaking of you reading this)...
Take care and happy crafting!
