Im not going to be too active at the mo!
I am FULL of cold at the mo and so im not going to be typing much - plus im not going to have too much to type about! Am staying inbed, drinking lemsip, and trying to forget about the dripping tap that my nose has turned into, and the little hamster that has gotten stuck in my throat and keeps scratching away and tickling/inflaming it!!!
Will be back soon though.....and probably be able to write wonderful reviews on all the movies im watching in the mean time!!
OOOOoooooooo....its soo pretty!
Now all i need is to buy the die cut things to use with it! hmmmm i knew there was a con in there somewhere!! he he, no just joking, in the long run if the card thing takes off then it will prove to be very valuable to be able to make the cards quicker......
heres to the cards having to take off now!!!
(will pop piccies on soon...)
AAAAAAAAAAAAAAAAAAGGGGGGGGGGGHHHHHHHHHH!!!!!!!!!!
I am buzzing right now!!!!!!!!!!!!!!!!!!!!!!!!!!!!!!!!!!!!
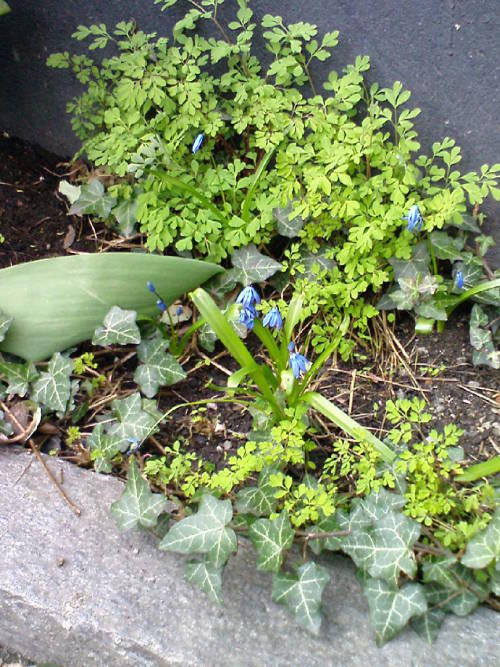
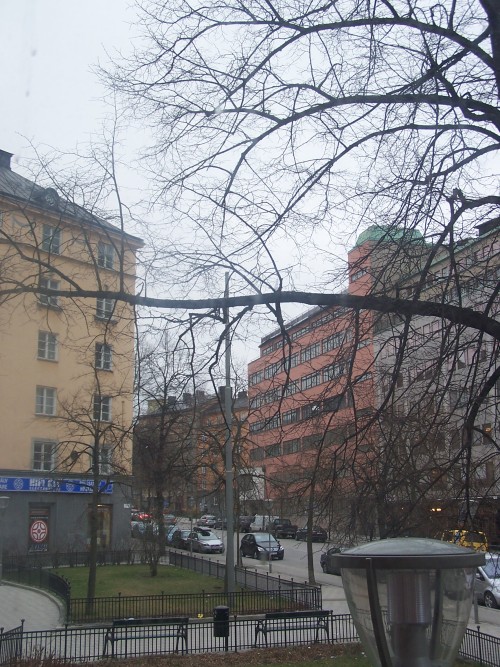
(dont say anything just incase it hears you - but i think spring is coming to sweden!)
So yesterday when I came back from giving the lady her dress before she travelled down to her mums (happy birthday by the way for today!), I walked into the court yard out back and suddenly thought - spring is coming! Now I know that flowers etc were trying to make a break for freedom back in january or something silly like that, but we've been having some pretty poo weather since then - so i really think that this could be the real thing now!
Here are some new piccies (taken on my new phone aswell - check me out!!!)

come on guys...you can make it!!!!!!!!!!!!!!!!!!!
______
Talking of the new phone - funny thought the other day - cause it is a walkman phone (and with my ipod having been stolen - cheers that to who ever did it!!! you sod!!) ive been using it whilst working out - thought: i could text or ring someone right there on the treadmill!!! or even next time im in a race, i could ring someone to tell them where i am! or video myself running along!!!! ooooo this modern technology hey!!!!!
here is the phone......not taken by itself cause that would just be silly....
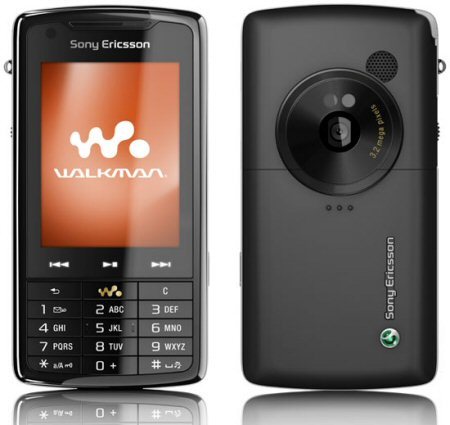
(piccie from www.phonereview.com)
EEEEEEEEEeeeeeeeeeeKKKkkkkkkKKKKK!!!!
Here is a piccie....
oooo and a very cheesy american video about it!!!
eeeeee!!!!!!!!!!!!!!!! (lord im sad!) i love it!!!!
Cool thing to try out for all you touch typers...
55 words
hope that worked.....
next time i do it i'll remember to put my glasses on!!
edit - i dont know why it is coming up like that, but it still works....
notes to say and point out....
_______________
The designs that i put on here of my work for the masters application ( i think they are in the march bit) - i designed and made the fabrics that are in the corners of these, aswell as designing the dresses....... just to let you know
Looky looky!!!!


*blush* i am proud!
edit: these arent my photos - i got them off www.nightfever.se - thought i best say this incase i get in trouble!
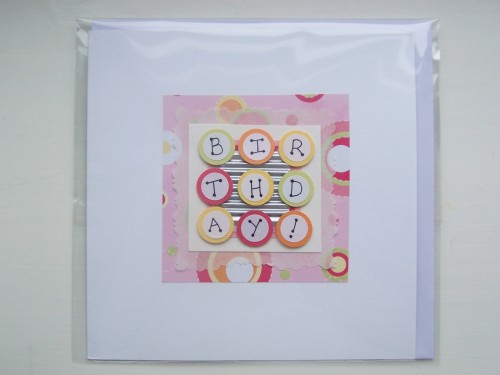
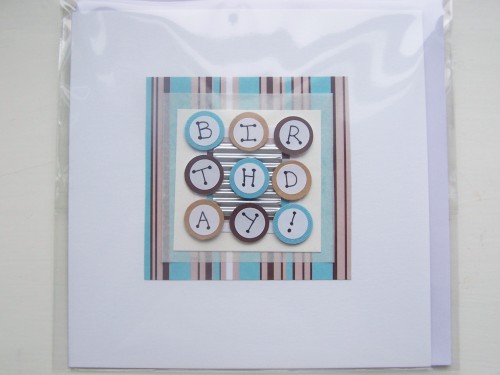
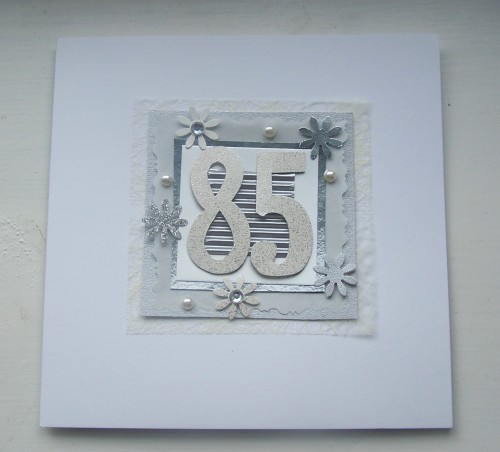
New card designs.....

So these are some new variations on the cupcake theme that I showed on here earlier - they are in plastic coverings to help keep them clean..

two 'male' versions

I wanted to make some 'birthday' themed cards, and after using the larger square on the 85th card, i thought id try this out again......and i like the effect! The first 2 are 'female' and the last 2 'male'....


Have been trying to come up with a female version of the 'happy retirement' card, but cant think of anything that the woman might do when she has retired - so i decided in the mean time to do a 'female' cutting tie card.....not too sure about this one....

So far the baby cards I have made have been for a new baby girl - this weekend I made the boy versions...
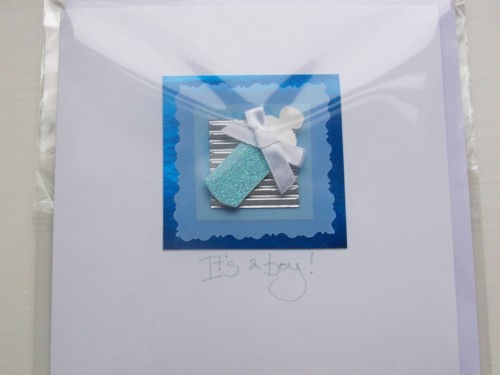
the blue baby bottle...
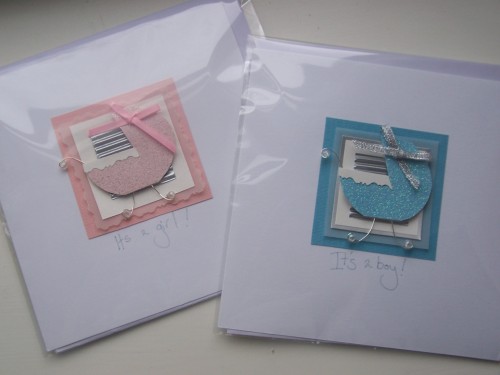
The blue baby carriage - i changed the pink one aswell so that the backing card is pink and not silver like before - i think it works better....
So yeah, these are the new cards! Am starting today on the wedding card designs and shall keep you posted on how these are turning out...... plus am going to start back on the jacket and curtains (have been naughty and not touched them the last week for working on the dress took up soo much of my time....)
Please comment and let me know your thoughts on the designs and if you have any ideas (especially for the female retirement!) for some new ones....
Take care
The card making process
I have been making quite a few cards this weekend due to a big order, so i thought it would be quite good to show the process and to see how you can really achieve everything yourself.......
So it all starts off choosing the theme of the card and what colour scheme you want it to have. All my cards have a kind of set layout at the moment and so this is the usual starting block for me. Make sure you are using a really good strong glue - if you are giving these cards to other people you dont want them falling apart on them! 
Although there are some really lovely papers out there and ready made items to attach, I like to make my own from scratch : no chance then of them ending up looking like somebody elses! Plus i think it adds a special something extra as as they say with cooking - make something with love and it is simply better......... or something like that! So here are the magical scissors that i have got - they cut the edges of the paper to the shape you can see on the side of the blade - you can buy many different pattern cutting pairs, but I find that personally these ones have done me fine......though never say never!!!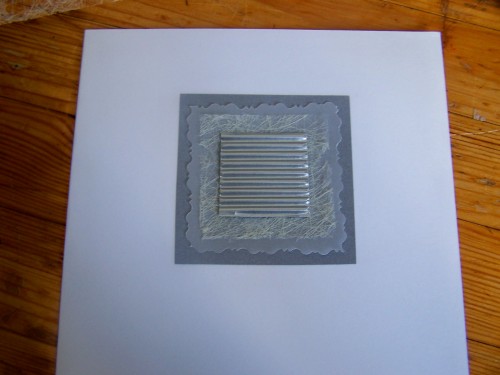
So for this card I want it to be quite soft and sensitive. Think about the shapes you are using and the desired effect you want, and make sure the 2 match....for example,if you look at my other cards, when i make cards designed for men, I usually keep to straight lines at the edges of the paper, and no the frilly looking patterns like here....
One thing I also like to do with my cards is attach some corugated card in the middle to act as i kind of plinth to raise the detail in the middle. I feel it helps centralise the viewers focus - plus it is good to have almost a trade mark look so if your cards or whatever start getting popular, then people can spot them from the rest.
Here is a good example of how you can achieve these items yourself and do not need to buy them....I have made this cross quite simply out of cutting the card with the pattern edging scissors - it gives a lovely effect and saved me about 20:- (about £1.20 say)....
I also use sticky pads to raise my central features even further, thus creating a lovely 3d effect.
Add a finishing touch of a rose (ok so i bought this! ;-) ) And think of a nice simple statement to write on the front. Now you can see why I chose these certain colours and effects. Another neat trick is not to use black ink all the time. It is very stark against the white back ground - so by using another colour you get a more asthetic appeal. But dont go too soft in colour or too light, you do need to be able to read the saying!
So this is how I make up my cards...The majority of the time spent is coming up with a nice composition. Dont stick things down straight away - move things about, try out different colours, paper types, etc - and try to get somebody elses opinion (my poor boyf is constantly getting badgered by me for his thoughts!) - remember, it isnt yourself who is necessarily going to be using the card! you have to be able to make them appeal to different tastes......
Any other questions or thoughts please do leave me a comment (in the kommentarer bit for the non swedish speaking of you reading this)...
Take care and happy crafting!
Another card.....

the lighting in this flat is awful!! this is it by flash, and now day light (aka windowsill!)
she wanted something along the lines of the other ones i have made - but nothing with any alcohol related items on it as the mother doesnt drink.....
I decided to go for something semi formal/traditional, but still with my style of work..... what do you think?
The dress is done!
Anyways, here are some images of the work in progress....
First of all I had to figure out how to make a cap sleeve without actually having a seperate sleeve....
I decided to just curve the shoulder seam done abit further and try it out at different lengths to see what would be best....
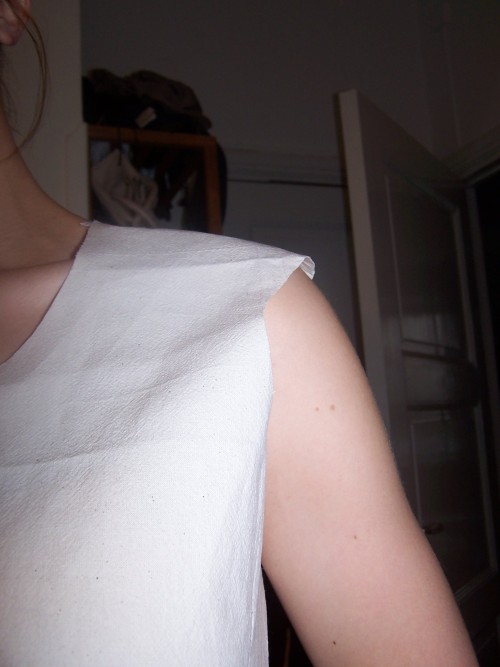
now remember this dress is not for me (my arm) and believe it or not this was actually 2 inches below the ladies shoulder line....anyways, i thought it didnt look much of a cap so i decided to take it abit further....

This one i liked, on me it doesnt look much but on her i was sure it would sit like a cap sleeve would (or the one she wanted anyways)....
Then it was down to the pattern manipulation..... Here you take the basic body block and slash it to add gathers where you want them...
she wanted gathers at the neckline, shoulders, waist and hem, but none around the bust area....
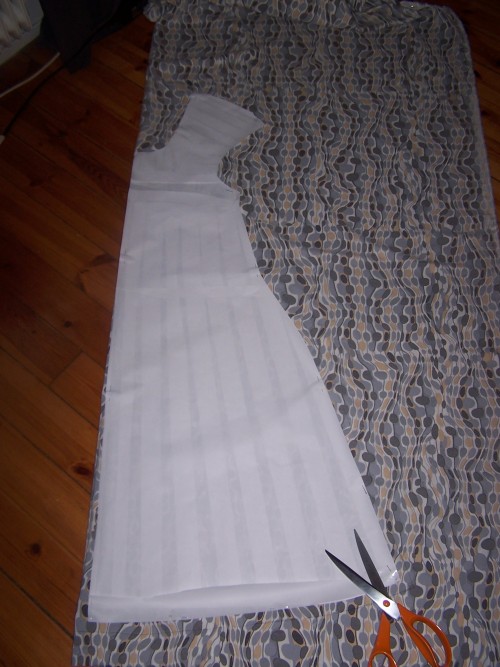
This is just before the first cut - always the scariest!! cutting into 750:- worth of fabric (about £60) is quite daunting incase i slip or bodge it up!!
You can see from the pattern how the slashing worked out and where i want it to gather and not....
.........
skip abit (im really crap at taking photos of the work whilst im doing it)
........
The dress is done!!! I dont have a photo of the lady in it as she felt like she wasnt suitable enough (i think it was the use of sock as footwear that did it! ;-) ) but i will get one!!!
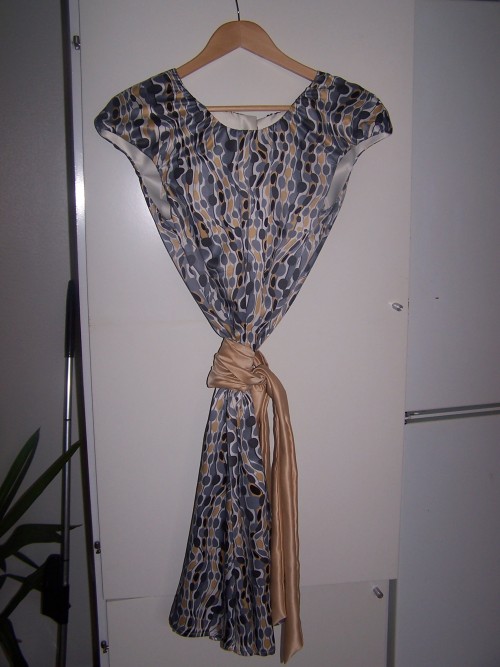
It doesnt look much here at all, but when on, it looked lovely! VERY pleased with the outcome indeed..

close up of neckline and shoulder gathers - these werent half difficult! made worse by the fact that the fabric is soo slippery... turn out nice though..

the different coloured beads i put in an earlier post....look good i think! cant really even tell they arent buttons!
.........
So all in all, very happy with myself....and thankfully so was she!
....on to the next project!
MISSING : SPRING
poo!!!!
Piccies of the material etc as promised...

so im going to be making 2 belts for the dress, one out of the sand colour and the other out the grey, meaning she can have different looks but the same dress!!!
very happy with how close i managed to match the colours.....
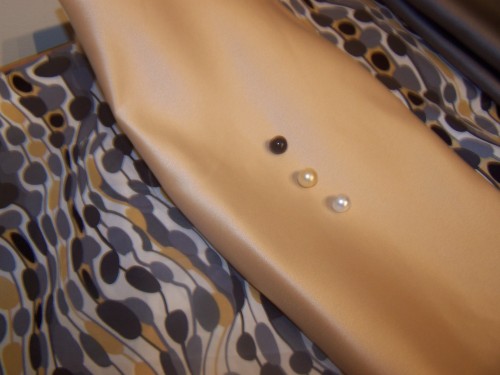
so these are the buttons i managed to find yesterday whilst out shopping - ok but nothing too exciting...

these are the buttons and beads that i am thinking about using.......would i get away with it??? i dont think you can really see that much difference in them....i mean could you really tell at a quick glance that they were different???
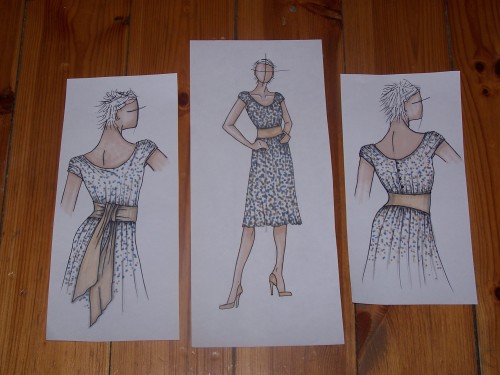
these are the final design ideas that the lady settled on...the one in the middle is quite self explanatory, to one on the right show how we are going to have a buttoned back opening (with white loops rather than button holes) but instead of the band in that picture, we are going to have a tie round belt like in the one on the left..... I think this should look really lovely!!! Other alterations are that she wants the back neckline rising, and the front one to come up just a tad....
SO its now on to the pattern manipulation!!!! eekk!!!! by tonight i should have all this cut out and started to sew!!!!
Deadline - 32 hours!!!!........
possible new card project...
will keep you posted......
finalised dress design...
So will put up some piccies tomorrow (am writing this all snuggled up in bed and im not gettting up for anyone...sorry x) to show you how it is coming along...She is coming over on wednesday for the final fitting - giving me 1 day left if there are any alterations needed....close and tight deadline this one, but it is quite simple in construction so that should be no worry....its whether or not i get the pattern right in the first place!!!!!
fingers crossed..!!!!!
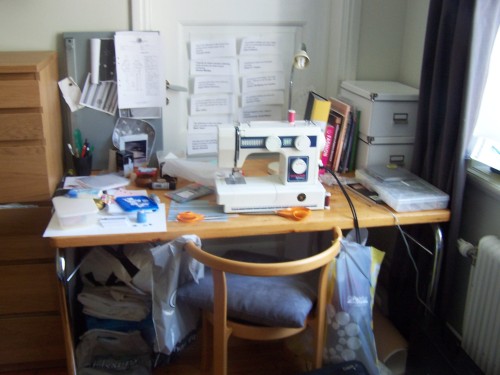
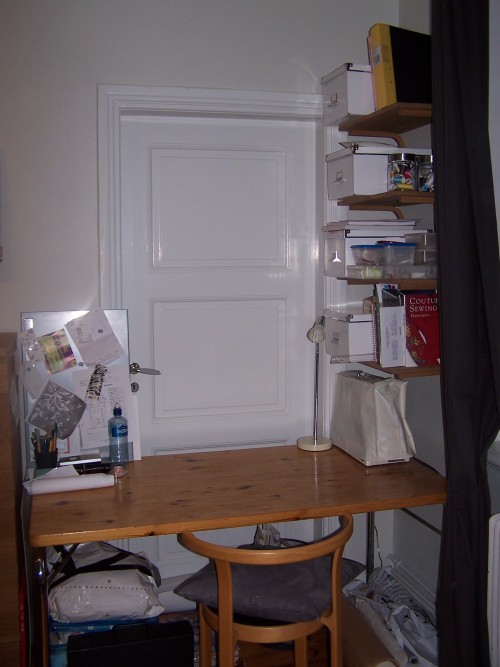
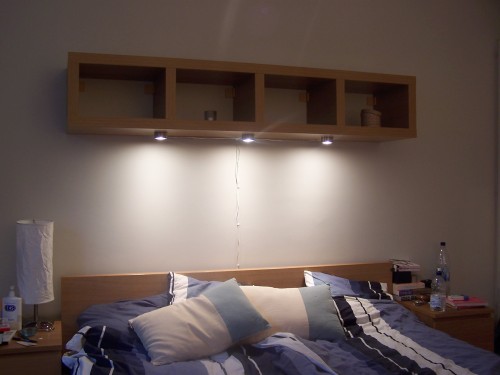
A done up work area!!!
After a hunt around, I couldn't find exactly what i wanted so i decided to make it myself!
Here are some piccies.....
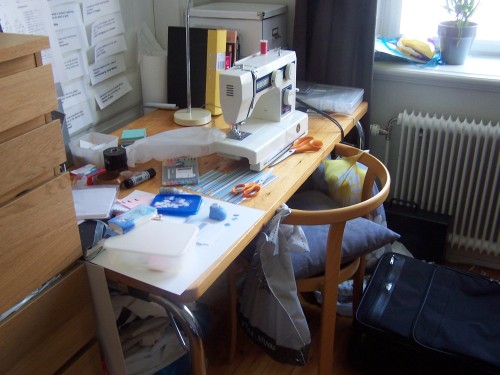
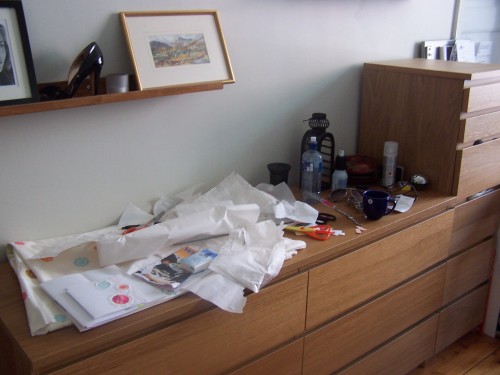
So this is the before....
......it was even starting to move around the rest of the room.......
......and yes that is a shoe on the picture shelf - its my kind of art!!!!!
So after finding no cabinet that was nice enough or would fit, i decided to buy some planks, cut them up and put the up as shelves...this worked out even better as the boyfs dad said he had some spare planks in his storage!!! bonza!!

As the planks were a kind of pine colour, i decided to stain them so they looked like oak to go with the rest of the furniture in the room...
Then last night, put the boyf and father to work and up went the shelves!!..

and then it was all done!!!! how much better does it now look!!!!!!!!!!!!!!!!!!!! i feel like i have a real little workshop area...just need something to store the large rolls of paper now (can still be seen under the table) but im going to wait on that to see if the business takes off or not first......
so in total this cost:
15:- per bracket (about £1.10) X 8 = 120 (about £8.80)
20:- for the stain (about £1.45)
planks - free
workers - free (though am going to cook them dinner later this week)
so this wonderful and EVER so much needed and loved new work area = 140 :- !!!!!!! (about £10!)
perfick as pa larkin would say (darling buds of may incase you dont know)
..........
Oh and dont think that i was being all female and leaving it to the boys, whilst they were doing that, i made and put this up.....
who needs men hey!!!!!! ;-)
Yummy new material...
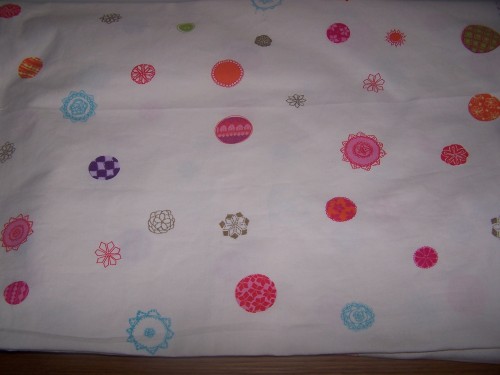
Am thinking about attaching them like the other circle cards i did with the sewing machine....

Plus am going to buy some brightly coloured threads to sew with to really set them off/out. Plus again, going to have a mess about with different edging effects, see what works best....
Will keep you posted on how they come out...
Narrowing the dress designs down...
The new dress
Here are the piccies of the designs so far....
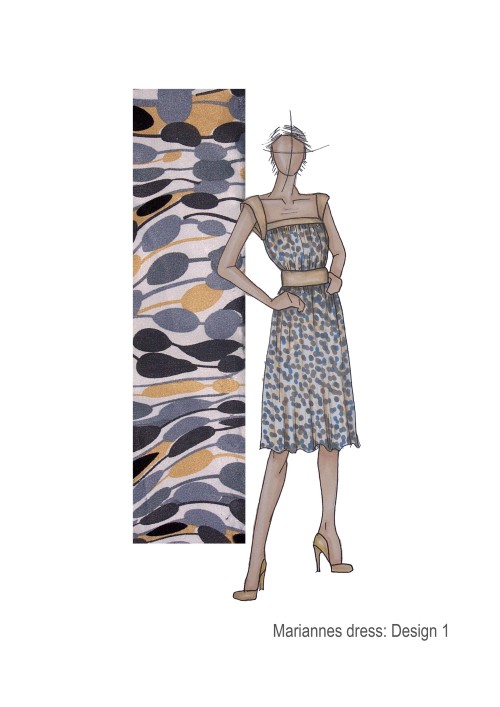


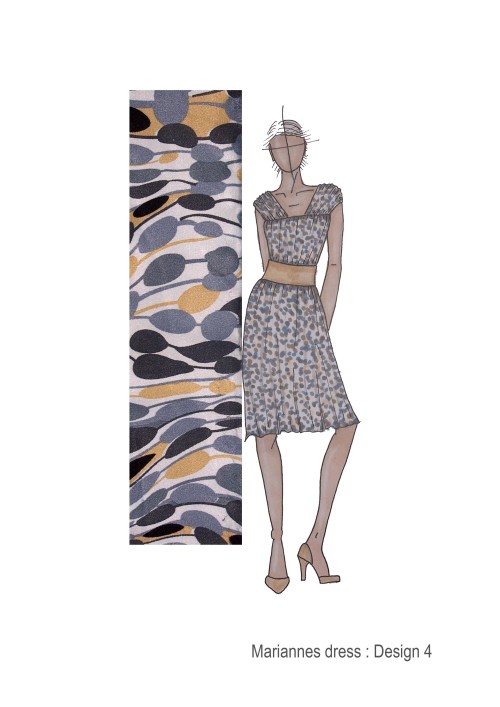
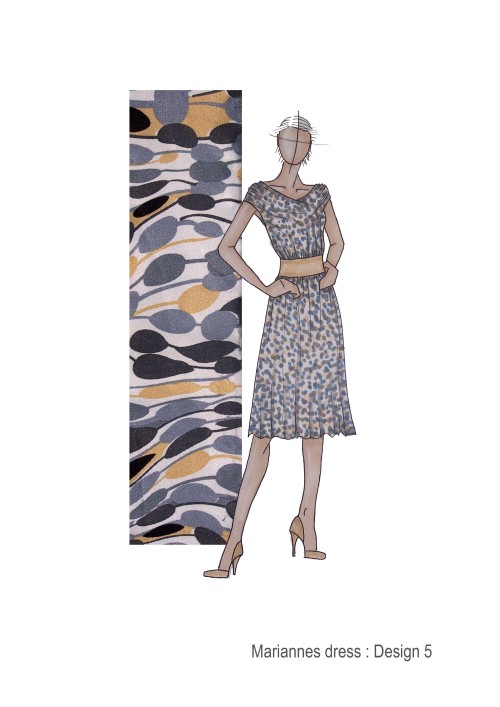

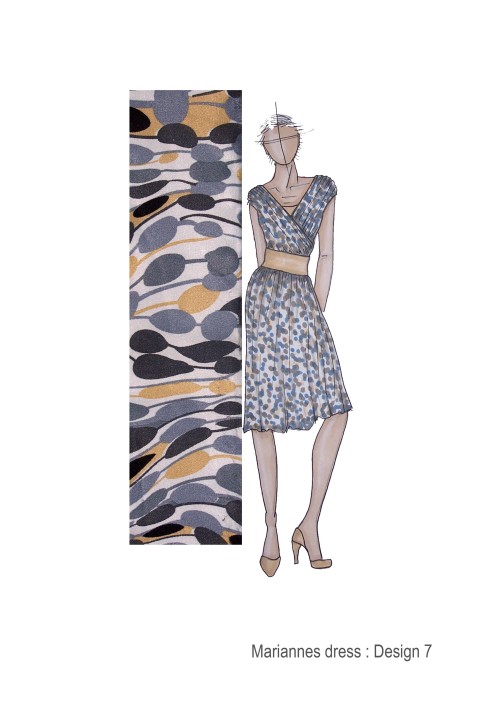
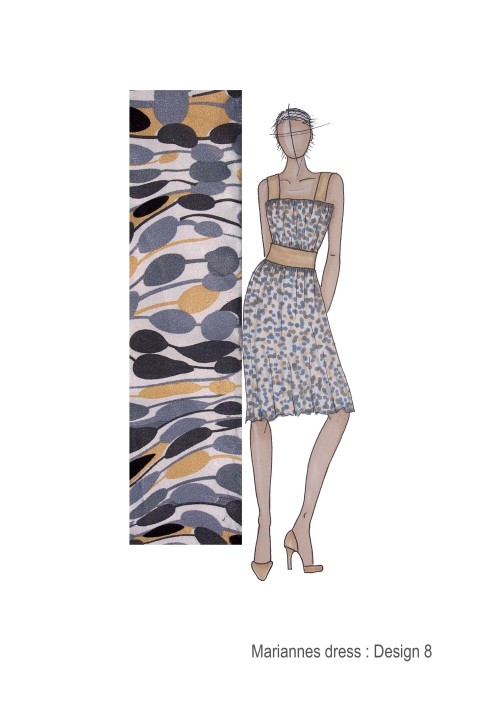
So as you can see they are all pretty similar but with the top and straps varying......
My favourite is design 1 as i think it is rather different. I also like design 4,5, and 7 as these are again something that is abit unusual. For the back of these im thinking of having an opening that is fastened with different coloured buttons using the colours in the fabric. Also the belt like middle bit will have the buttons at the back, but this is my idea at the mo and need to clear it with the client.
So now im off to go and draw up her basic body block from which to make the patterns from....oh and i have the get the jacket cut out again with the alterations as that lady is coming again in 2 days......eeek! getting rather busy now!
Please leave me a comment to let me know what you guys think to the designs...... many thanks x
New projects
Ive also gone through my old posts and decided that the photos of the cards look crap! and so im going to try and find a way of photographing them better.........maybe scanning would be better?.......hmm... if you know of any way please say so....
so i best be off and get my stuff together to go and do some fabric hunting......
have a good day people! and be happy - the sun is starting to come back to us!
